


Are you tired of ‘floppy’ drums that don’t punch through your mix? Chances are, the samples you’re using are not the problem. It predominantly comes down to two considerations: the mix, as well as your processing, whether it’s compression, EQ, reverb, or saturation, for example. The following five steps will drastically help you get your head around making your drums sound the absolute best.
Step One: Balance the Dry Drums
Before applying effects to your drums, make sure they’re mixed well as-is. We recommend sending all your drum samples to a single bus to help consolidate their sound. Keep your kick in a separate bus so it doesn’t get processed along with your other drums; you want your kick to maintain its punch as much as you can. Start by balancing the kick and snare, the kick should typically be the loudest element in your mix.
Step Two: EQ
Once your drums are balanced with each other, check to see that they still mix well with your other tracks. If certain frequencies are conflicting, it’s a lot easier and less frustrating to address individual samples with EQ, instead of the bus. This way you don’t accidentally deaden other sounds in the process. Because you don’t want to have your drums bus and kick competing, put a hi-pass (low-cut) filter on your bus at 80 Hz (+24/oct slope). This should drastically improve your low-end mix, unless you’ve already cut out or delicately mixed conflicting low-end frequencies.
It’s also extremely helpful to reference tracks in a similar genre. For those with some extra dough to spend, Ozone and Fabfilter offer fantastic ‘EQ-matching’ abilities in their EQs.
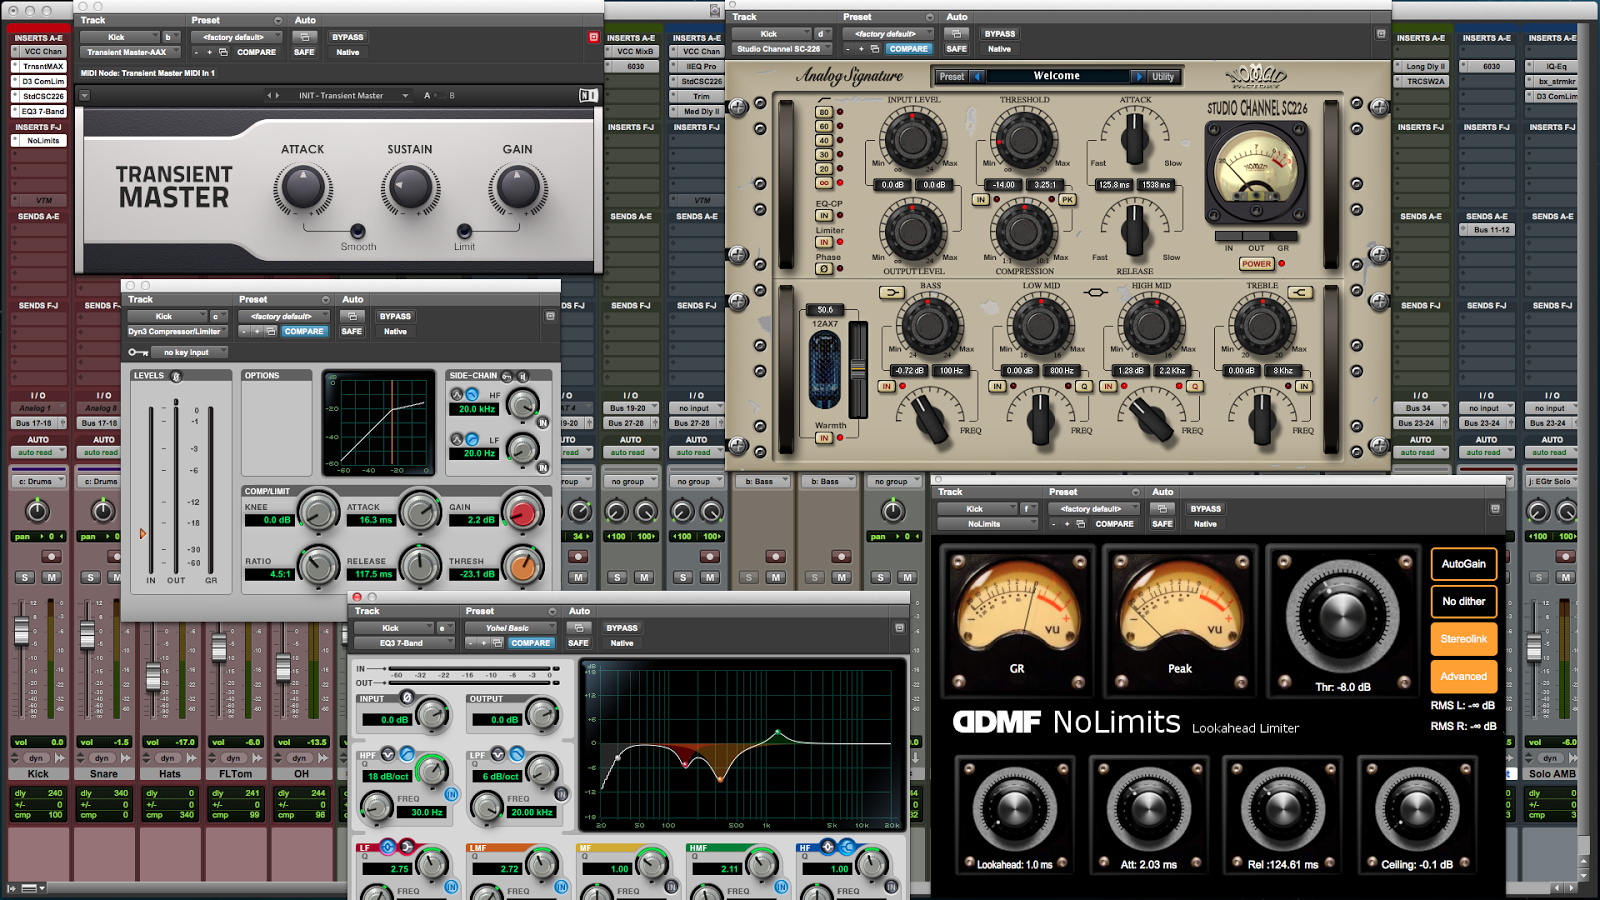
Step Three: Compression
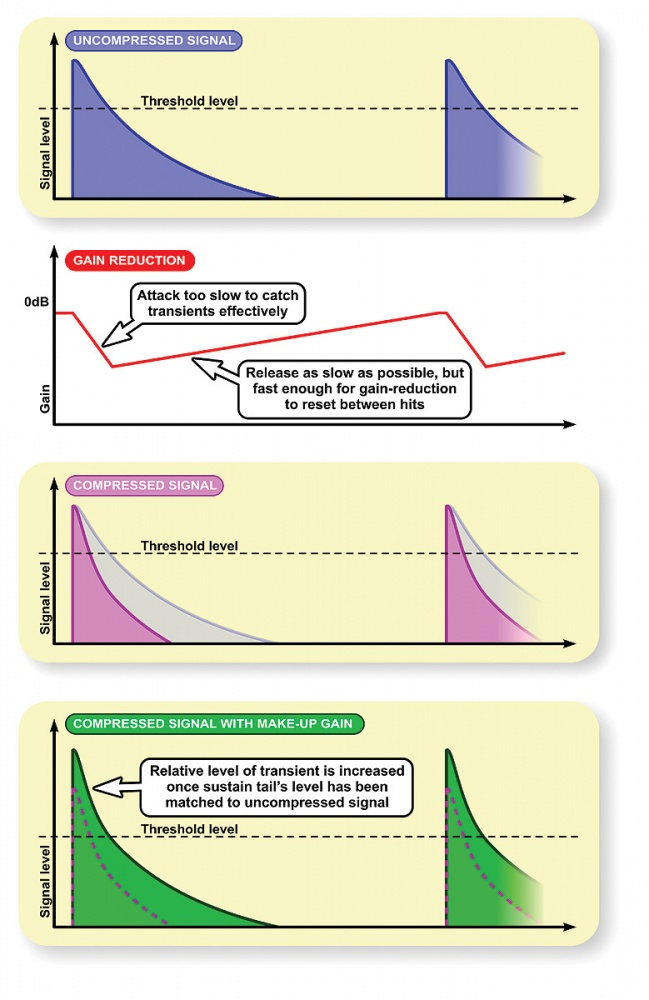
Ok, now for the fun part. Compression is a vital tool in your effect arsenal which lowers the dynamic range of audio running through it. An attack time of 3ms is a good starting place for drums, too short and you’ll get unwanted blips and clicks. Adjust the attack time to dial in what works best for your tune, a shorter attack time is better for tracks with less dynamic range.
cred: https://www.soundonsound.com/techniques/compression-fashion-drum-sound-you-want
At this point, it’s a good idea to go back to your reference tracks and ask yourself these questions- Are my drums as punchy as my reference track? Do they maintain their fullness consistently? Is the compressor deadening or exciting my drum sounds?
2-10 dB of gain reduction is an average range of how much you’ll typically want to be compressing your drum bus. Slowly raise your release time from its smallest value up to its highest once you’ve dialed in your attack and address your transients. USE YOUR EARS- do not choose a setting because ‘it looks cool’ or any other superficial reason. Presets are also a great way to hear some different types of drum bus compression. All the major DAWs have drum compression presets that are a great starting point for getting a particular sound, whether it’s ‘loud & punchy’, ‘fat & compressed’, or ‘lightly squeezed’.
Step Four: Reverb
Reverb works similarly to compression in your drums bus in that it helps ‘glue’ together your sounds. However, this step must be done extremely delicately. Too much reverb will cloud the punchy drums coming out of your compressor. By using some simple math, you can make sure this doesn’t happen to you. Because most reverb plugins have decay time in milliseconds, we’ll use that to our advantage.
60,000 (ms) ÷ [your track’s bpm] = x ms = a 1/4 note of your piece (at 120bpm, a 1/4 note is 500ms)
With this in mind, you should shoot for a decay time on your reverb that’s less than a 1/4 note in your track. If your reverb doesn’t have dry/wet controls, you’ll have to put it in a new bus and send the audio of your drum bus there. Blend the reverbed signal with the drums until it’s at a place you like.
Step Five: Additional Tweaking/Effects
Now it’s time to check everything. Is your reverb decay too long? Does your reverb have too much low end? Have your drums lost their punch? Tweak, tweak, tweak! This should take a while, make sure to give your ears a break so fatigue doesn’t set in and fuck up your judgment. Make calculated choices and frequently ask yourself, “why am I doing this?”
There’s more that can be done, that is if your computer’s processor will let you. Native effects won’t typically slow down your computer too much, but these following plugins will. There’s also plenty of free options to expand your library.
For beefier transients in your drums, there are transient-processing effects, like SPL Transient Designer. Many of us can’t afford the price tag but fortunately, there are great free versions of this type of plugin, like BitterSweet v3 by Flux for instance. This effect should be put before your reverb or compressor, whichever you find sounds best. Be careful not to put it in line after a reverb so it doesn’t trash all your awesome work thus far.
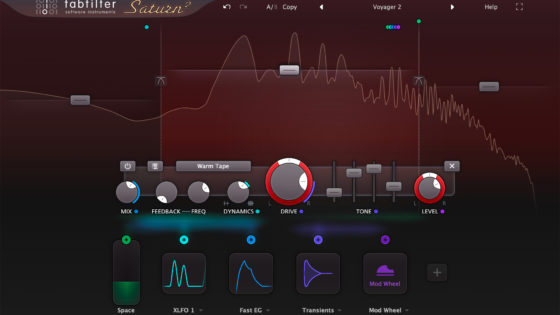
Another well-used plugin for drum bussing is saturation. There are many free options available, but for thumpin’ Dirtybird-style beats, you may want to invest in Soundtoys Decapitator. This powerful plugin is used across genres and works extremely well as an analog-modeling plugin. It sounds great!
To go over everything one could do to their drum bus would take a lifetime. However, we’re sure you all have your own favorite techniques and plugins- share with us below!
Important things happen in Pacific Northwest nightlife, and DMNW will send you alerts!